3 Easy Steps for Red Pepper and Tomato Soup Recipe from an Unlikely Source!

**This recipe uses readily available pantry ingredients! Read on for a fast and delicious soup recipe**

IMG-7677

Do you remember chain letters?  Years ago we used to get them for a variety of reasons…send a postcard to a bunch of people and receive hundreds of postcards from all over the world; send a dime to ten people and receive hundreds of dollars back; send on a message of good wishes to ten people and if don’t, you will meet with bad luck!  Of course, you always need to be careful that you are not engaging in a hoax.  In my teens and 20’s, you had to re-write the letters and use the postal service to send them on!  Naturally, when email came along, chain letters became easier to send and receive.  I’ve sent on a few simple ones in my day, and have rarely received back what was promised, but that was no surprise!  The chain is often broken.  The most interesting chain letter I received was from someone I knew very well and it proposed sending a book to the person on top of the list and you’d receive a large number of books back.  I did intend to do this to see what would happen, however, I never did send that book.  I bought one of my favourite books and I never got around to getting the proper packaging and going to the post office!  That book is still sitting on my shelf more than 20 years later!  I wonder if I would have received books in return?

It has been many years since I have sent any sort of chain letter, but in March I received an interesting looking chain letter from a very good friend.  The letter asked you to send a recipe to the person at the top of the list and then send the chain letter to ten other people.  In return you were supposed to receive 36 recipes.  Normally, I probably wouldn’t have gotten around to doing this, but at the time our life had just entered into a holding pattern with everything locked down and social distancing in place.  And, after all, I do write a food blog, so recipes are my thing!  I took a few minutes to send on one of my go-to recipes and waited to see what would happen.  I did get a recipe back within a few days and ended up receiving 7 or 8 recipes over about two weeks.  It wasn’t what was promised, but I thought that was a pretty good return.

I received an easy and delicious looking soup recipe that happened to be from another person I know through my work.  Since I love making soup, I tried it immediately and it was a big hit in our house!  As with all recipes, I tweak them a little to make them my own, so I adjusted the spices on this one.  The original recipe called for ⅛ tsp cayenne and ⅛ tsp black pepper, which I omitted.  It also called for crushed herbed tomatoes, but I used plain tomatoes because I find the canned herb tomatoes have a less than authentic taste.  I always use the best quality plain tomatoes I can find and add my own seasoning. Currently I’m loving the Mutti brand tomatoes.  They taste almost as good as your own fresh canned tomatoes!

After trying this recipe, I decided that it could also be served as a chilled soup in the warmer months, so I’ll give it another try in the summer too!  The recipe serves 12 but can easily be cut in half if you don’t want to do a large recipe.  Thanks so much to T.M. for this recipe.  And, thanks to D.L. for starting the chain letter!  Give this recipe a try and let me know what you think in the comments below…and, if you get a recipe chain letter, give it a go and see what you get!

Happy cooking friends!


Easy Red Pepper and Tomato Soup

  • Servings: 12
  • Difficulty: easy
  • Print

IMG-7677

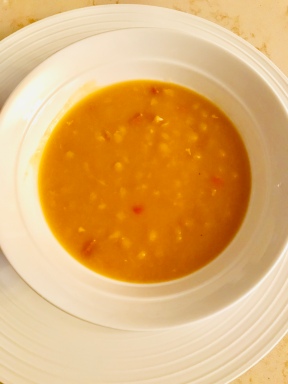
This is a quick and easy recipe using pantry ingredients.  It can be served hot or cold, for a large crowd or do half the recipe for a smaller group.  It also freezes well.

Ingredients

  • 1 medium onion, diced
  • 4 medium garlic cloves, minced
  • Approx ¼ cup butter
  • 2 large potatoes, peeled and diced
  • 2 – 12 oz jars (370 ml) roasted red peppers, drained and chopped
  • 2 boxes good quality chicken broth (approximately 2 quarts or 1.8 litres)
  • 2 – 14 oz cans (398 ml) pears with juice, chopped
  • 1 – 28 oz (796 ml) can crushed tomatoes
  • Salt and pepper to taste
  • Chopped fresh herbs, optional (use basil or cilantro)

Directions


  1. Saute onions and garlic in butter until translucent and fragrant, approx 3 minutes
  2. Add all other ingredients and simmer for about 25 minutes, until potatoes feel soft when poked with a fork
  3. Cool slightly and blend with an immersion blender until soup is smooth and creamy


Tips:  

Use the best quality can tomatoes you can find, or your own freshly canned tomatoes

Add ⅛ tsp cayenne pepper and other herbs if you prefer a spicy version


recipe posted by: everydayhomegourmet.blog/ 

5 Easy Steps for Busy Cooks to Make Healthy and Tasty Fries at Home

There aren’t too many people who do not like French Fries!  Actually, I can’t think of anyone I know who does not like them.  Of course, many adults have learned to see these as treats and only eat them occasionally.  I do enjoy fries, but know that I can’t eat them all the time. So, when I get a craving, I make a healthier baked version at home.  Because they are seasoned and I get them crispy, they definitely satisfy my craving.

IMG-6983If you want home-baked, crispy, flavourful fries, here’s what to do:

  1. Wash and dry red-skinned or Yukon Gold potatoes.  Leave the skin on. I usually do one medium potato per person for average appetites
  2. Slice potato longways into about ½ inch thick pieces.  Then slice the rounds into about ½ inch thick sticks
  3. Put all the sticks in a bowl with some olive oil, salt, pepper, paprika and garlic flakes or garlic powder.  Toss to evenly distribute the oil and seasonings. Drain excess oil through a slotted spoon
  4. Place potato sticks on a baking sheet with space between them to allow the air to circulate.  (You can line the baking sheet with foil or parchment paper if you like)
  5. Bake on the bottom rack of the oven at 350 to 375 degrees for about 25 to 30 minutes or until crispy.  Turn them over halfway through the cooking time. If you have a convection oven, switch to the convection setting for the last 5 minutes for extra crispiness

I have tried using convection for the whole time and lessening the cooking time, but I have found that the fries come out crispy, but a little too dry inside.  Only using convection for the last few minutes seems to preserve the soft potato pulp inside the fry.


IMG-6984
Thanks to Strewn Winery for this tasty idea for oven-roasted green beans

I posted a photo of the fries and the rest of the dinner that went with it on Instagram last week.  Perhaps some of you saw that post. I also roasted some green beans in the oven with olive oil, salt, and pepper.  They come out great that way and seem to have a more intense flavour than boiling or steaming gives them. This is a quick and easy way to do them and I thank Strewn Winery for that idea!!  We got the recipe from a cooking class we attended there years ago and use it regularly!  The marinated, grilled chicken breast was the main part of the meal and we had a mixed green salad too. 

Our go-to marinade for the chicken is:

  • 1 tbsp olive oil
  • about 1/8 cup lemon juice
  • 1/2 cup dry white wine
  • 1 crushed garlic clove
  • salt and pepper

This is a go-to for us because they are tasty ingredients that we always have in the house.  You can certainly change it up by using orange juice or lime juice instead of lemon and add some herbs too.  Check out what you have in your pantry and make your marinade according to the flavours you enjoy…leave out the citrus and wine and use soy sauce and ginger…the options are endless!IMG-6985

This meal comes together in no time and is tasty any time of year for your family, or even for company.   You can also do the fries with sweet potatoes and other root vegetables like carrots, rutabegas, parsnips and turnips. 

Because you can control the amount of fat, salt and seasonings when you cook at home, go ahead and enjoy these tasty fries any night of the week.  Give it a try and let me know what you think! Happy Cooking, friends!

An alert for my email followers!

Hi all,

If you subscribe to this blog via email, you will notice that the recipe link in the email you just received takes you to the wrong place.  Here is the corrected link:

Pot Pie with Puff Pastry

For those who are directly accessing the blog and wish to read the current post, the link is correct.  Please keep reading below, or click on the October archives to read the current post on limiting food waste and making a delicious Turkey or Chicken Pot Pie.

My apologies for the inconvenience!

Two Recipes to Reduce Food Waste…Turkey Pot Pie Using Thanksgiving Leftovers

Canadian Thanksgiving was this past weekend, so many of you will still have some turkey, vegetables, stuffing and maybe you’ve even made a turkey broth.  Reheating those leftovers makes for a great weeknight dinner, but you can also turn them into a new dish by making a turkey pot pie. Today’s blog will give you two ways to make a delicious turkey pot pie using the food you already have, and one way to make it with prepared and frozen elements.

My Mom always made homemade chicken or turkey pot pie when we were growing up.  She did a great job with her made from scratch pastry. I’ve used her pastry recipe for all kinds of sweet and savoury pies and quiches, and mine is okay but doesn’t come out as good as Mom’s.  It’s all in the touch! So, about 25 years ago when I found a recipe for a crustless pot pie on the back of the Stuff N Such or Stove Top Stuffing box, I was thrilled. I used to make it monthly in the cooler months and often made it for friends and family at times when they couldn’t cook for themselves.  It was quick, tasty and easy to make for a weeknight meal. All you need is condensed soup, milk, a box of stovetop stuffing, a bag of frozen mixed vegetables and cooked turkey or chicken.

In these past 25 to 30 years of cooking, I have concentrated on reducing my use of prepared foods and foods with multisyllabic ingredients!  So, I have modified this recipe to use my own homemade stuffing and homemade broth (or good quality low salt, organic boxed broth). It takes a little longer to make but I don’t mind that when I know my time is resulting in something that is healthier.  I have found that as I have reduced the added salt in my diet over time, my palate changed and I’ve learned to enjoy less salty food just as much. I still use salt in cooking, but at least I know how much I’m adding when I do it myself.

Of course, sometimes time is the most important thing, so I have included both versions of this recipe so that you can decide what works for you.  The recipe below indicates ingredients and directions for each version separately.

194D9689-5D76-4893-9FFC-61562F8AAFBE_1_201_aA few years ago I found a great recipe online courtesy of Pepperidge Farm, for a pot pie that uses puff pastry.  I love this version because it means I don’t have to make the pastry myself and the buttery, flakiness of the puff pastry provides great texture and flavour.  The recipe also suggests how to make a lovely lattice top crust.  Whether I make this recipe with turkey or chicken, I also add diced potatoes and chopped fresh green beans. This is one of my favourite comfort food dishes to make in colder weather. 

Here is the link to this recipe:

Pot Pie with Puff Pastry

  9FC333D2-56D5-4B1E-94F3-C345C2A27166_1_201_a So, now you actually have 3 ways to make a pot pie without making homemade pastry and also using up the food you already have.  Whichever version you choose, your tummy will feel warm and satisfied! Let me know how it goes!

Happy cooking friends!


Easy Crustless Turkey Pot Pie

  • Servings: 4 to 6
  • Difficulty: easy
  • Print

Use your leftover homemade stuffing, turkey broth, and fresh or cooked vegetables to create this tummy-warming dish.  If you are in a real hurry you can use boxed stuffing, condensed chicken soup mix, and frozen vegetables to make a delicious dish in a hurry.

Ingredients

Version 1

  • ¼ cup butter
  • 2 ribs diced celery
  • ¼ cup diced onion
  • about ⅓ cup flour
  • about 3 cups turkey broth
  • ½ tsp broth
  • ½ tsp ground black pepper
  • 3 cups cubed cooked turkey
  • 4 cups cooked or fresh chopped cauliflower, carrots, green beans, frozen peas, mushrooms (you can also use whatever leftover veggies you have from your Thanksgiving dinner.  Fresh veggies will stay firmer and the cooked ones will provide a softer texture with less cooking time)
  • about 4 cups leftover stuffing

Ingredients

Version 2

  • 1 box stove top stuffing
  • 1 can condensed turkey or chicken soup
  • 1 can milk
  • 1 bag frozen mixed vegetables (I usually use carrots, cauliflower, broccoli)
  • 3 cups cubed cooked turkey

Directions

Version 1

  1. Melt butter in frying pan.  Sauté celery and onion until slightly soft and fragrant
  2. If using fresh vegetables, add them now and cook until tender but crisp
  3. Add flour and combine until dry
  4. Add broth and bring to a boil.  Cook until thickened
  5. If using leftover cooked vegetables add them to the pan now and stir to combine
  6. Add cooked turkey and combine
  7. Transfer entire mixture to casserole dish
  8. Cover with your stuffing
  9. Bake at 350 F for about 30 minutes until hot and bubbling at the edges
  10. Let rest for 5 to 10 minutes and serve

Directions

Version 2

  1. Prepare Stove Top Stuffing according to directions on box and set aside
  2. Empty contents into casserole dish
  3. Add one can of milk and stir to combine
  4. Add frozen vegetables and cooked turkey and combine
  5. Cover mixture with stuffing
  6. Bake at 350 F for approximately 30 minutes until hot and bubbling at the edges
  7. Let rest for a few minutes before serving

Tips:  Version 2 is definitely quicker, however be aware that you are using prepared foods that contain more salt and other things you might not want as compared to Version 1.  If using chicken to make this recipe, use chicken broth!

recipe by: everydayhomegourmet.blog/ 

3 Ways to Keep the Easy Summertime Cooking Going into September

I have been meaning to share my many make-ahead salad recipes with you all summer, but it seems that I have just been spending time enjoying summer fun, cooking, entertaining and soaking up time with my family and friends during this fabulous summer.  Even though it’s Labour Day already I know summer isn’t over yet! We’ll still have some warm days, nights and weekends to enjoy throughout this month where you can still revel in some easy summertime cooking on your own or with family and friends. If you are a regular reader of this blog, you know that I am a big fan of meals that I can prepare ahead of time.  Make ahead meals seem to come to mind more quickly in cooler months when we tend to do casseroles, slow cooker recipes, and soups. But, you can also prepare things ahead to keep summer cooking easy and be less tied to the stove. And, if you do this into September, you’ll keep that summer vibe going for a little longer!

Here are 3 ways to keep that easy summertime cooking going:

  1.  Make a meal plan for the week and shop for the produce and meats you need all at once, at least a day ahead of your meal prep day
  2. Make one grain salad and one vegetable salad that will last 3 to 5 days (see below)
  3. Marinate your meat, fish or chicken before freezing it and you’ll be all set to go on the day you need it (see July 15, 2018 post for more summer cooking tips)

My secret weapon for easy summer cooking is to make salads ahead that can last for 3 or 4 meals.  We tend to think of things such as pasta salads, potato salads and coleslaw for potlucks and picnics, but why not incorporate them into your weekly summer meal planning?  I have been doing this for many years now and it helps us eat nutritious and delicious food all week long. And it takes the guesswork out of what to make each night. I usually do a pasta, potato, rice or other grain salad each week and also do a marinated vegetable, such as coleslaw, marinated green beans, tomatoes and cucumbers, etc.  With two of those choices prepared to last for 3 to 5 days, all you have to do is pull those out of the refrigerator and throw one of your pre-marinated meats on the grill – and voila…you’ll have a nutritious, fun summer meal in no time at all. These dishes last for days and in many cases, the flavour improves as the marinade sinks deeper into the grains and vegetables.  

The salad I’m sharing with you today is particularly good in the late summer as our local tomatoes are at their best.  This is yet another fresh tasting favourite from my childhood that my Mom made frequently in summer. It’s a hit whenever I make it.  You can serve it right after making it, but if you let it sit for at least 30 minutes, the flavours will combine better.

For more summer make-ahead recipes, have a look at my posts from last summer.

Enjoy!

Tomato and Cucumber Salad

  • Servings: 10 to 12
  • Difficulty: easy
  • Print

tomato cucumber

A fresh and juicy side dish for your summer meals!  It can be made ahead and kept in the fridge for 4 or 5 days.  Flavour will intensify each day. Use Roma tomatoes if you can.  They have a great meaty flesh that’s perfect for this salad.

Ingredients

  • 12 medium sized ripe Roma tomatoes
  • 1 and a half English cucumbers
  • ½ of a sweet onion (Vidalia) sliced thinly
  • 10 to 12 fresh basil leaves

Dressing:

  • ½ cup extra virgin olive oil
  • ¼ cup red wine vinegar
  • Salt and pepper to taste

Directions


  1. Slice and cut the tomatoes into bite sized pieces (4 pieces per slice usually works well)
  2. Peel and slice cucumber into bite sized pieces 
  3. Roll and slice basil leaves thinly (‘chiffonade’)
  4. Combine tomatoes, cucumbers, onion and basil in a serving bowl and set aside while you assemble dressing
  5. Mix dressing in a measuring cup or jar.  Whisk or shake to combine. Pour over tomatoes and cucumber mix and toss well.

recipe by: everydayhomegourmet.blog/ 

This One-Bowl Recipe Makes Two Family Favourites that Take You from Weekday to Weekend!

You have to love it when the same 8 simple ingredients make two different meals that everyone in the family is likely to enjoy.  That’s definitely the case for the recipe I’m posting today, and the great news is that you are likely to have most of this on hand already:

  • Ground chicken
  • chopped onion
  • breadcrumbs
  • eggs
  • salt
  • Pepper
  • dry mustard
  • and a little tomato juice

Combine it all in a bowl and it will turn into a wonderful Chicken ‘Meat’ Loaf for a weeknight meal and some very tasty Chicken Sliders to barbeque on the weekend!  If you make a double batch, you can have the loaf for dinner and freeze the sliders for later.  One prep, one clean-up, and you get two meals!

The inspiration for this recipe is my Mom’s meatloaf.  Mom made a very tasty traditional meatloaf that I enjoyed very much.  One of the things I like to do with my cooking is to occasionally take those traditional dishes and use some different ingredients.  Ground beef was a staple in my Mom’s time and since then we’ve learned that limiting red meat in our diets is a healthy choice. So, a number of years ago, I decided to try ground chicken in Mom’s meatloaf instead of ground beef and I ended up loving it so much, that I always use ground chicken now for this loaf.  The tender consistency is very pleasing and it’s lighter tasting than the beef. The dry mustard and the tomato juice add a nice tang and additional flavour.

As with a lot of the things my Mom makes, there is not a recipe written down.  She goes a lot by look, feel and taste – and experience! So, when I first started making meatloaf I couldn’t get it to stick together, which was frustrating.  The egg and breadcrumbs act as a binder and I seemed to be using the same amounts as my Mom, but my loaf would crumble into pieces every time it was cut, rather than staying in a nice slice that you could easily plate.  It would look like ground beef crumble rather than a loaf.  I definitely didn’t have the same touch as Mom! So, the solution I came up with was to use two eggs instead of one and ever since then, I can get nice full slices from my loaf. 

Chicken meatloaf
Chicken loaf served with roasted potatoes and salad

If you are lucky enough to have leftovers, put the loaf in the fridge for a few hours to get it nice and cold.  Then, slice it thinly to use in sandwiches for lunch. It tastes great and is a healthy alternative for anyone who is trying to limit the use of cold cuts.


Another great thing to do with this same recipe is to turn it into chicken sliders.

unnamed
Tasty chicken sliders for your next BBQ

I love the smaller size of a slider compared to a large burger because it doesn’t look so daunting to eat.  And, if you are hungry after one, you can certainly have another! They’re a great size for little kids and adults who may not have a huge appetite.  And, those who have a larger appetite can have 2 or 3! When we are cooking these for a crowd, I usually plan for 2 sliders per person and add 2 more to the total.  That should account for some people eating one, most people eating 2 and a few might have 3….or more! With this plan, everyone has enough to eat and we sometimes have leftovers also.

I found this handy slider press that gives you the option of 1, 2, or 3-ounce sliders.  It’s by a company called Outset and I bought it at Kitchen Stuff Plus.  It helps me make the patties the same size each time, which makes the cooking easier too because they’ll all be done at the same time.

This is a long weekend in Canada that is considered to be the unofficial start to summer for most of us, so there are likely to be lots of backyard BBQ’s going on if weather permits…so give this recipe a try and let me know how you like it.  This easy and tasty recipe makes a ‘meat’ loaf for 4, or 6 sliders of 3 ounces each.  Whip up a batch of sliders.  They freeze well too!  Click here for the recipe.

Happy cooking, friends!  Enjoy the long weekend, fellow Canadians!


No Reservation for Mother’s Day?  No Problem! Use 5 ingredients to Make this Fancy and Easy Dish in a Flash!

It’s certainly nice to go out to restaurants to celebrate special occasions, but when those special occasions are observed by many people at the same time like Valentine’s Day, Mother’s Day, Father’s Day, etc., perhaps a restaurant is not the best choice.  On those special days, restaurants can be overly busy and sometimes restrict your time there and often have reduced menus, and even increased prices. And, maybe you are on a bit of a tight budget at this time of year and still want to do something special for Mother’s Day.  So, why not try making a special brunch at home for your Mom or your spouse? If it sounds daunting, please don’t stop reading because I have a simple idea for you that you can put together very quickly with ingredients you probably already have on hand.

Also, this is a very attractive, tasty and healthy dish.  And, although the Moms in your life might appreciate a special meal and some extra attention, they may also be concerned with health and calories and the large portions you often get in restaurants.  So, these Mediterranean Scrambled Eggs are a great alternative. They are fancy enough for special occasions and quick and easy enough for any weekend meal. (I often make these for myself!!)

In just a few minutes, you can turn this…..Scrambled eggs with ham, tomato, greens, kalmata olives ingredients Aug 13, 2017


Into this….Scrambled eggs with ham, tomato, greens, kalmata olives end product Aug 13, 2017


And you will have made the ‘everyday’ into ‘gourmet’.  The “oohs and aahs” are likely to follow!

Here is what you need:

  • Eggs
  • Ham
  • Olives
  • Fresh greens or spinach
  • Grape or Cherry tomatoes


Here’s what to do:

  • Melt about 1 tbsp butter in a medium frying pan
  • Scramble 2 eggs per person in a bowl
  • Add chopped ham, olives (whole or sliced lengthwise), coarsely chopped spinach or greens, grape tomatoes (sliced lengthwise) to scrambled eggs, along with a little salt and pepper
  • Gently turn and pull the egg mixture across the pan until soft curds form and eggs are cooked to your liking


Serve with:

  • Buttered toast, jam or marmalade on the side
  • Sliced fruit, or a simple yogurt parfait in a small clear dish or glass. (See picture)

    IMG-4341
    Plain yogurt, cinnamon, honey and berries in a simple glass make a lovely parfait
  • Mimosa or mix orange juice and sparkling water for a non-alcoholic version
  • Coffee or tea in her favourite mug or pretty teacup


Options for Extras:

  • Set a special table using a table cloth, pretty napkin, and a simple flower arrangement or single flower in a bud vase
  • Serve on a tray for breakfast in bed with a pretty napkin and single flower in a bud vase
  • Have her favourite music playing in the background


Unlike many fancy dishes you might find when searching for Mother’s Day treats, this one is low prep, quick to make, quick to clean-up, as well as nutritious, filling, and beautiful!  Give it a try and turn the everyday into gourmet. Your Mom or spouse is sure to enjoy it your delicious food and the quiet time at home! Let me know how it goes…Happy Cooking, friends!

A Quick and Tasty Meatless Monday Idea with Uncomplicated Ingredients

I love meat, chicken, fish, and seafood! As a result, most of the meals I make has one of those elements in it!  Like many other people these days, I am aware of the value of adding meatless meals to my diet so I’m trying a few new things every now and then.  I came up with this idea this week based on ingredients I already had on hand.  I am a great believer in making meals with what you have in the house already rather than running to the grocery store daily.  If you plan your pantry and fresh ingredients with a variety of food you enjoy, having a peek inside will provide you with lots of options for quick and tasty meals.  (As you might know, “justlookinthefridge” is one of the hashtags I frequently use on Instagram).

This penne with chickpeas, tomato sauce, and grilled zucchini came together in no time and was very satisfying.  It’s also a very economical dish to make.  It’s a vegetarian dish and can also be gluten-free if you use gluten-free pasta.  If you don’t like tomato sauce or don’t have any on hand, you can dress the pasta with extra virgin olive oil, a bit of lemon juice, lemon zest, fresh herbs and a bit of the pasta water.  Using the salty, starchy pasta water adds flavour and helps the sauce stick to the pasta.  Also, don’t forget to serve your pasta dishes in heated bowls or plates.  This helps the food stay warm longer and avoids adding condensation to the dish when hot meets cold.  I usually warm my plates in the oven at about 200 degrees F. for about 10 minutes.

I used grilled zucchini for this dish because the green colour of the skin adds visual interest to the dish.  Remember, we eat with our eyes too!  (Also, that’s what I had in the fridge!).  Grilling the zucchini adds extra flavour.  If you don’t have zucchini any other green vegetable would work too.

If you have leftovers, put them in an oven safe dish, top with parmesan and mozzarella and bake in oven until cheese melts for a cheesy casserole version for another night.

If you are unsure if Meatless Monday is for you, give this a try because it’s budget-friendly and won’t take a lot of time.  Let me know how it goes – and please share any favourite meatless meal ideas that work for you.

Go to the recipes tab for a clean printable version of the recipe including the notes.

Happy Cooking friends!

Chickpea Tomato Penne

  • Servings: 4 to 6
  • Difficulty: easy
  • Print

Ingredients

  • 3 tbsp olive oil
  • ⅓ cup chopped onion (I use Vidalia or sweet onion.  Green onions would work too)
  • 1 clove garlic, minced
  • 1 can chickpeas, drained, rinsed and dried
  • 1 grilled zucchini (chopped) – you can also use uncooked zucchini
  • About 450 grams cooked penne
  • About ⅓ cup pasta water
  • About 1 litre of tomato sauce
  • Salt and pepper to taste

Directions

  1. Saute onion and garlic in hot olive oil until soft and fragrant (about 2 to 3 minutes)
  2. Add chickpeas to the pan and cook to combine flavours about 3 minutes.  If using uncooked zucchini, add it to the pan and cook for another minute or two.  (Grilled zucchini can be added at the end). Add a little salt and pepper
  3. Reduce heat to low and cover
  4. Add penne to large pot of boiling salted water and cook until ‘al dente’ (about 10 minutes)
  5. While pasta is cooking, heat tomato sauce in another pot
  6. Drain cooked pasta, reserving about ⅓ cup pasta water
  7. Return pasta to the large pot.  Add chickpea mixture, pasta water, grilled zucchini and tomato sauce.  Toss to combine. Serve in heated bowls with grated parmesan and fresh herbs

Variations:  

  • Instead of adding tomato sauce in step 7, add extra virgin olive oil, a bit of lemon juice, lemon zest and fresh herbs
  • Add whole baby spinach leaves at the end to either version
  • If you’ve got leftovers, put them in an oven safe dish, top with parmesan and mozzarella and bake in oven until cheese melts for a cheesy casserole version

recipe by: everydayhomegourmet.blog/  

Company’s Coming! 10 No-Bake Dessert Ideas for Busy Home Cooks

When I first started having dinner parties for friends as a young adult, I really wanted everything to be homemade.  After all, that’s what my Mom always did, so why wouldn’t I do that too?  I always made a plan for the dinner ahead of time, writing down what I was going to make and always starting the prep with dishes that took the longest to make.  That was usually the dessert.  So, I would take a few hours early in the morning or the night before the dinner to make one of Mom’s famous desserts or to make a new recipe I found.  Once the dessert was done, I’d start on the rest of the meal prep.  It was many hours of cooking and preparing and it was always well received, so I enjoyed doing it.

As years went on and life got more complicated, there was a need to make some changes.  I still wanted to be a great host and offer my guests an excellent meal, but I needed to streamline things to make it sustainable.  All these years and hundreds of dinners later, I have developed systems that are different from those early years, and certainly just as good!  (It helps that my husband is an eager and capable sous chef!) . I should mention that I’d rather eat savory food than sweets, but I know that most people like to end the meal with something sweet, so I am happy to provide that!

I know that there are many wonderful store-bought cakes and desserts available for us these days and I do use those occasionally and try to add my own spin when serving them.  As a diner myself, I get a bit overwhelmed when I’m served a giant piece of cake on a plate.  I much prefer smaller bites of things to choose from, which makes me think that there are probably other people who feel this way too.  So here are a few suggestions I have for no-bake desserts that can satisfy the sweet tooth and avoid overwhelming the meal.

  1. Always have some gourmet chocolates on hand (preferably individually wrapped so you can put them in a lovely bowl on the table)
  2. Have some small, gourmet cookies on hand.  Served on a plate beside the bowl of chocolates, they can be a satisfying, last minute dessert when people pop inIMG-1951
  3. Keep some frozen mini eclairs or cream puffs on hand.  Serve them on a plate with berries and drizzle them with caramel or chocolate sauce for a visually pleasing and satisfyingly sweet end to the meal
  4. Hollow the core out of apples (one per person).  Fill and drizzle them with a mixture of raisins, nuts, brown sugar, and melted butter.  (Add a little rum, if you like!)  Bake for about an hour and serve warm, with or without whipped cream on the side.  (Yes, I realize I said this post was “no bake” – however, I consider this no-bake because there is no measuring of ingredients and cleaning of extra bowls – just throw it in the oven).
  5. Remember, yogurt and berries can be a dessert.  I put this one together on a day when we were in a vacation rental and had limited availability of ingredients and kitchenware.   So, I used what was on hand… non-fat Greek yogurt, honey, cinnamon, and berries.  I used the nicest glasses that were in the kitchen and used them to serve individual portions.  As a bonus, this is also a gluten-free dessert! Next time, I would add a fancy cookie to this (gluten-free if needed!)
  6. If you have a favourite cake recipe, bake it in a small loaf pan baking tin and then you can ice and freeze the individual loaves to slice later.  Serve the slices on a beautiful platter and have guests help themselves to as much or as little as they like.  I did this with my Mom’s carrot cake recipe and it was a big hit.  You can also serve a fruit and nut platter with this.  In these times, so many people are trying to eat healthier and limit sugar, so giving them an option to have just a few bites of something sweet can satisfy the craving and be very much appreciated.
  7. Sliced bananas with brown sugar and orange liqueur sauce on pound cake.  Make the sauce ahead by melting butter and brown sugar, then add a few slices of your favourite liqueur.  Set aside to heat up just before serving.  Add sliced bananas and serve on a slice of pound cake or scoop of ice cream or frozen yogurt. (Gluten free without the cake)
  8. Canned (or fresh) peach halves, served with yogurt flavoured with honey and cinnamon, nuts and caramel drizzle in the space where the pit would be.  (I got this idea from The Canadian Living Rush Hour Cookbook many years ago).  It’s a light and fresh tasting sweet treat – also gluten-free
  9. No Bake Ice Cream Cake is a summer favourite in my house.  Only 3 ingredients and it looks so fancy.  You can make it ahead – big or small – and keep it in the freezer for whenever you need it.  Go to recipes and scroll down to get the instructions
  10. Grilled peaches served with frozen yogurt are great in the summer.  You can grill the peaches before the guests arrive and set aside for later.  Serve at room temperature or heat them in the oven for a few minutes.  Add some frozen vanilla yogurt, and a few mint leaves and you have a sweet, fancy plate that didn’t require hours of baking and clean up.  If you’ve got some chocolate or caramel sauce, give it a little drizzle.  This is another gluten-free treat.

I hope these ideas help you create a delicious treat at the end of your meal with little fuss and preparation.  As always, drop me a note to let me know how you like these ideas and please share any that you have that work for you.

Happy cooking, friends!

As Promised…Mom’s Pea Soup Recipe

If you’ve read the last post, I promised to share my Mom’s recipe for pea soup.  It takes a little time, but is well worth the effort!  Here it is:

Pea Soup

  • Servings: 8 to 10
  • Difficulty: easy
  • Print

fullsizeoutput_695

Don’t be put off by the cooking time…this is passive cooking time so you won’t be working the whole time, just monitoring the pot!  You can make the ham broth one day and finish the soup the next day if time is an issue. This soup is a delicious way to make use of your leftover ham and get all the goodness and nutrients out of that ham bone from your baked ham family dinner.

Ingredients

  • 450 to 600 grams of whole yellow peas or split yellow peas
  • Ham bone
  • Diced ham (pulled from the bone of your baked ham)
  • 6 to 8 litres cold water
  • 1 cooking onion (optional)
  • 2 large carrots (optional)
  • 1 large celery stalk with leaves (optional)
  • 1 bay leaf (optional)
  • 10 whole peppercorns (optional)

Directions

  1. Soak peas overnight in cold water
  2. Place ham bone in a large stock pot and fill with cold water (about 6 to 8 litres)
  3. Optional:  add cooking onion, one carrot, celery stalk, bay leaf, peppercorns to pot
  4. Simmer 1 ½ to 2 hours
  5. Remove ham bone (and all items from step 3, if using).  Let broth cool and place in fridge overnight
  6. Remove broth from fridge and skim off and discard any fat that has formed on the top
  7. Heat broth.  Drain peas and add to the hot broth.  Cook for about 1 hour or until peas have softened and broken down slightly
  8. Dice one large carrot in small pieces and add to soup in the last 15 minutes of cooking, along with diced ham


Tips:  This should be a fairly thick soup, (like a potage) but if you find the soup is too thick for your liking, add a little water or broth to reach your desired consistency


recipe by: everydayhomegourmet.blog/